MAESTRO PROCEEDURE
Lowering the spectrograph from the
alignment frame to the cart
Last Revision: April 18, 2013, Jill Bechtold
This document in WORD This document in PDF
Introduction
For working on the spectrograph off the telescope, we
constructed a tan, steel �alignment frame� which allows us to take the
spectrograph off the cart and hang it as if it were on the telescope. We investigated using the NOAO Flex Rig
for this purpose (see photo archive), but decided not to use it for a number of
reasons. The MAESTRO alignment
frame is modular, and can be disassembled for transport. Detailed photos of the alignment frame to aid assembly and
disassembly are in the photo archive, along with notes.
General Notes
1. Read the
procedure through before starting, to
remind yourself about what needs to be done. Review �Tour of the MAESTRO spectrograph� to remind yourself
of terminology.
2. The
underlying principle to keep in mind during this procedure is that MAESTRO is
quite asymmetric, and will tip easily.
The use of nuts and allthread enables the raising and lowering of
MAESTRO in a controlled manner, without bending the spectrograph body, or
tipping.
3. Make sure
cables are safely stowed out of the way so they will not be pinched.
4. Having 4 people
makes the tedious part of the procedure go quickly.
One person can do it by themselves if necessary, but at
least two people are recommended.
Two people can complete this procedure in about 2.5 hours.
Equipment needed
1. Two ¾
inch wrenches for each person. One
of these should have a ratchet to make the procedure easier. MAESTRO has purchased several ¾
inch wrenches and ratchets for this procedure.
2. One inch
driver.
3. Hardware to attach spectrograph to the cart. These should be left attached to the
cart when the spectrograph is on the alignment frame:
¾ inch
bolts, each 2 inches+
¾ inch
washers
¾ inch nuts
4. Six lengths of 5/8 inch allthread attached with nuts and
washers in all but the two inner weldment attachment locations (see photo). These usually are attached to the
alignment frame, and travel with it.
5. Level
6. 12-inch ruler, or similar. One for each person is optimal.
Procedure
1. Roll the cart under
the spectrograph. Roughly align the cart to match up the eight
attachment wings on the spectrograph. There is only one way the spectrograph will fit on the cart: the cart and the alignment frame are
both labeled with �Grating side� and �Dewar Side� so you can go in the right way.
BE CAREFUL NOT TO SMASH THE CART INTO
THE SPECTROGRAPH.
Note that the cart moves easily,
and changes direction easily IF it is
moving. If it is not moving, the
cart is heavy and changing direction of the wheels is very difficult. Those of you who have driven a car
without power steering will understand how to move the cart naturally.
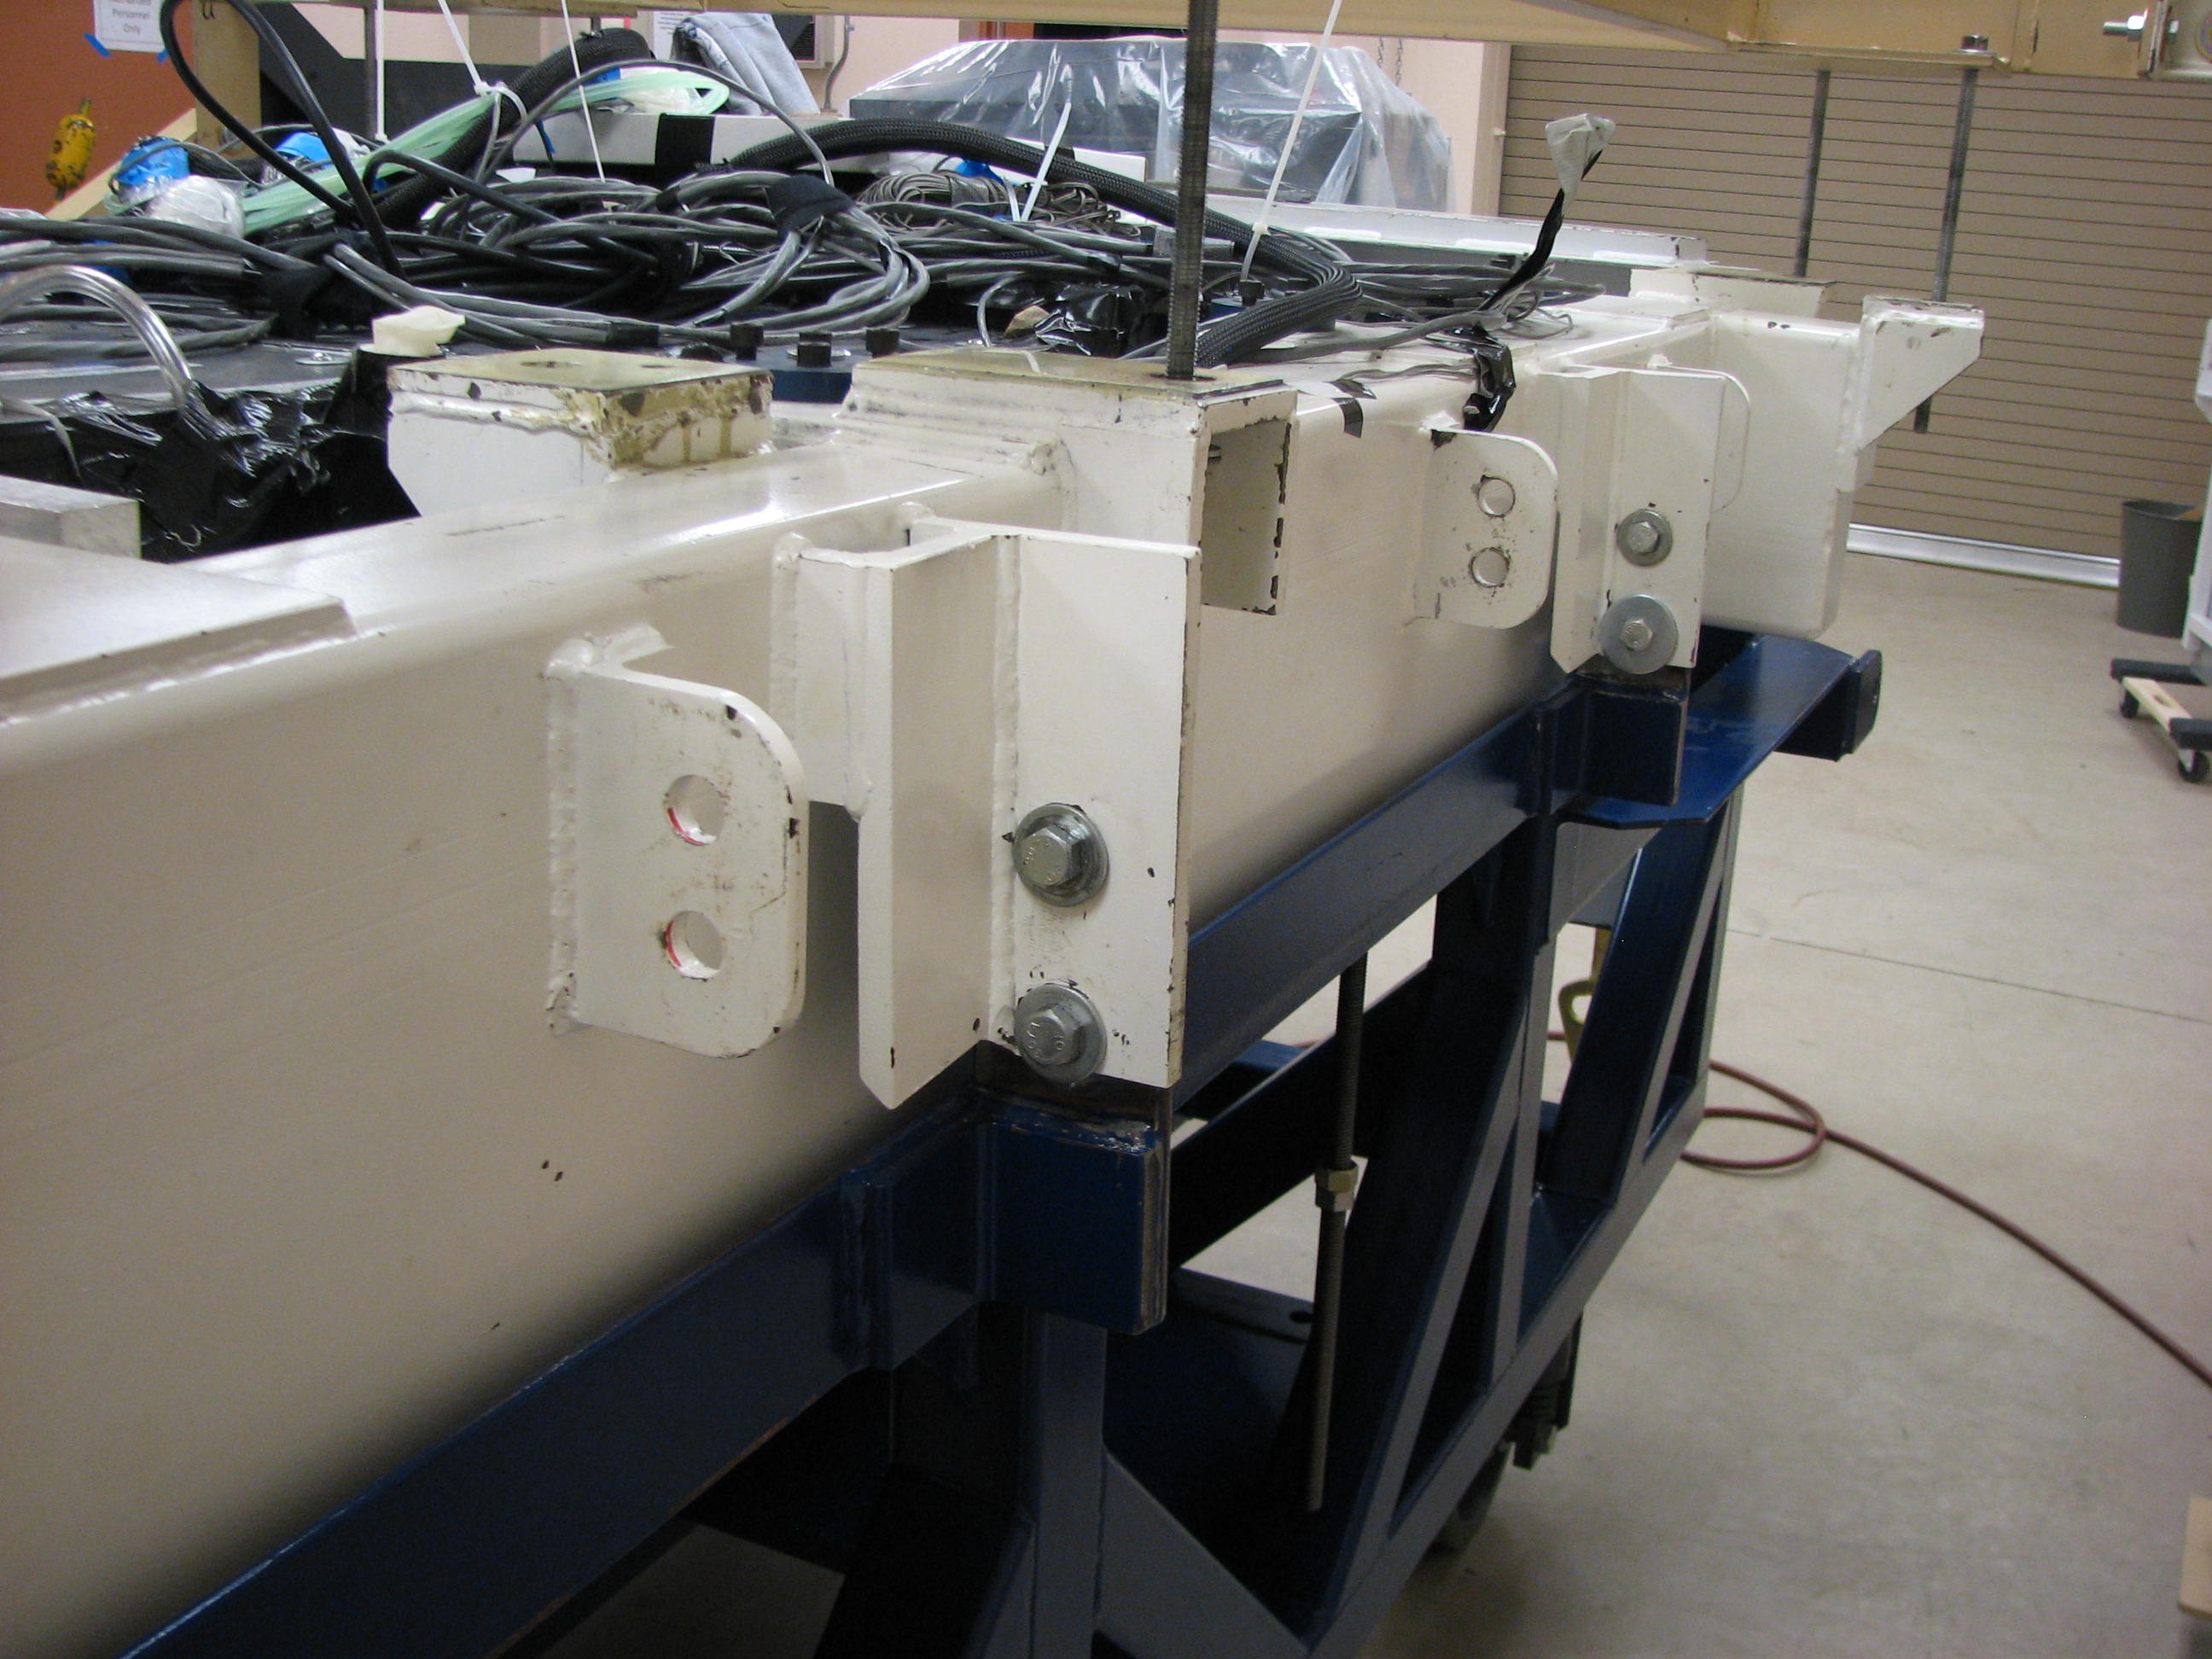
The 4 spectrograph weldment attachment wings should be to the
grating side of the cart attachment wings.
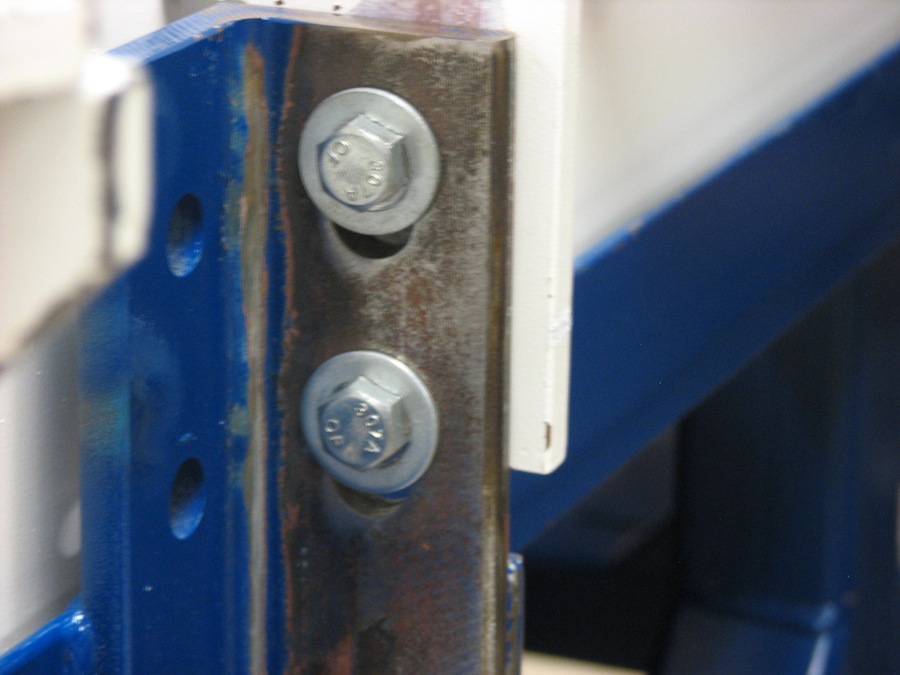
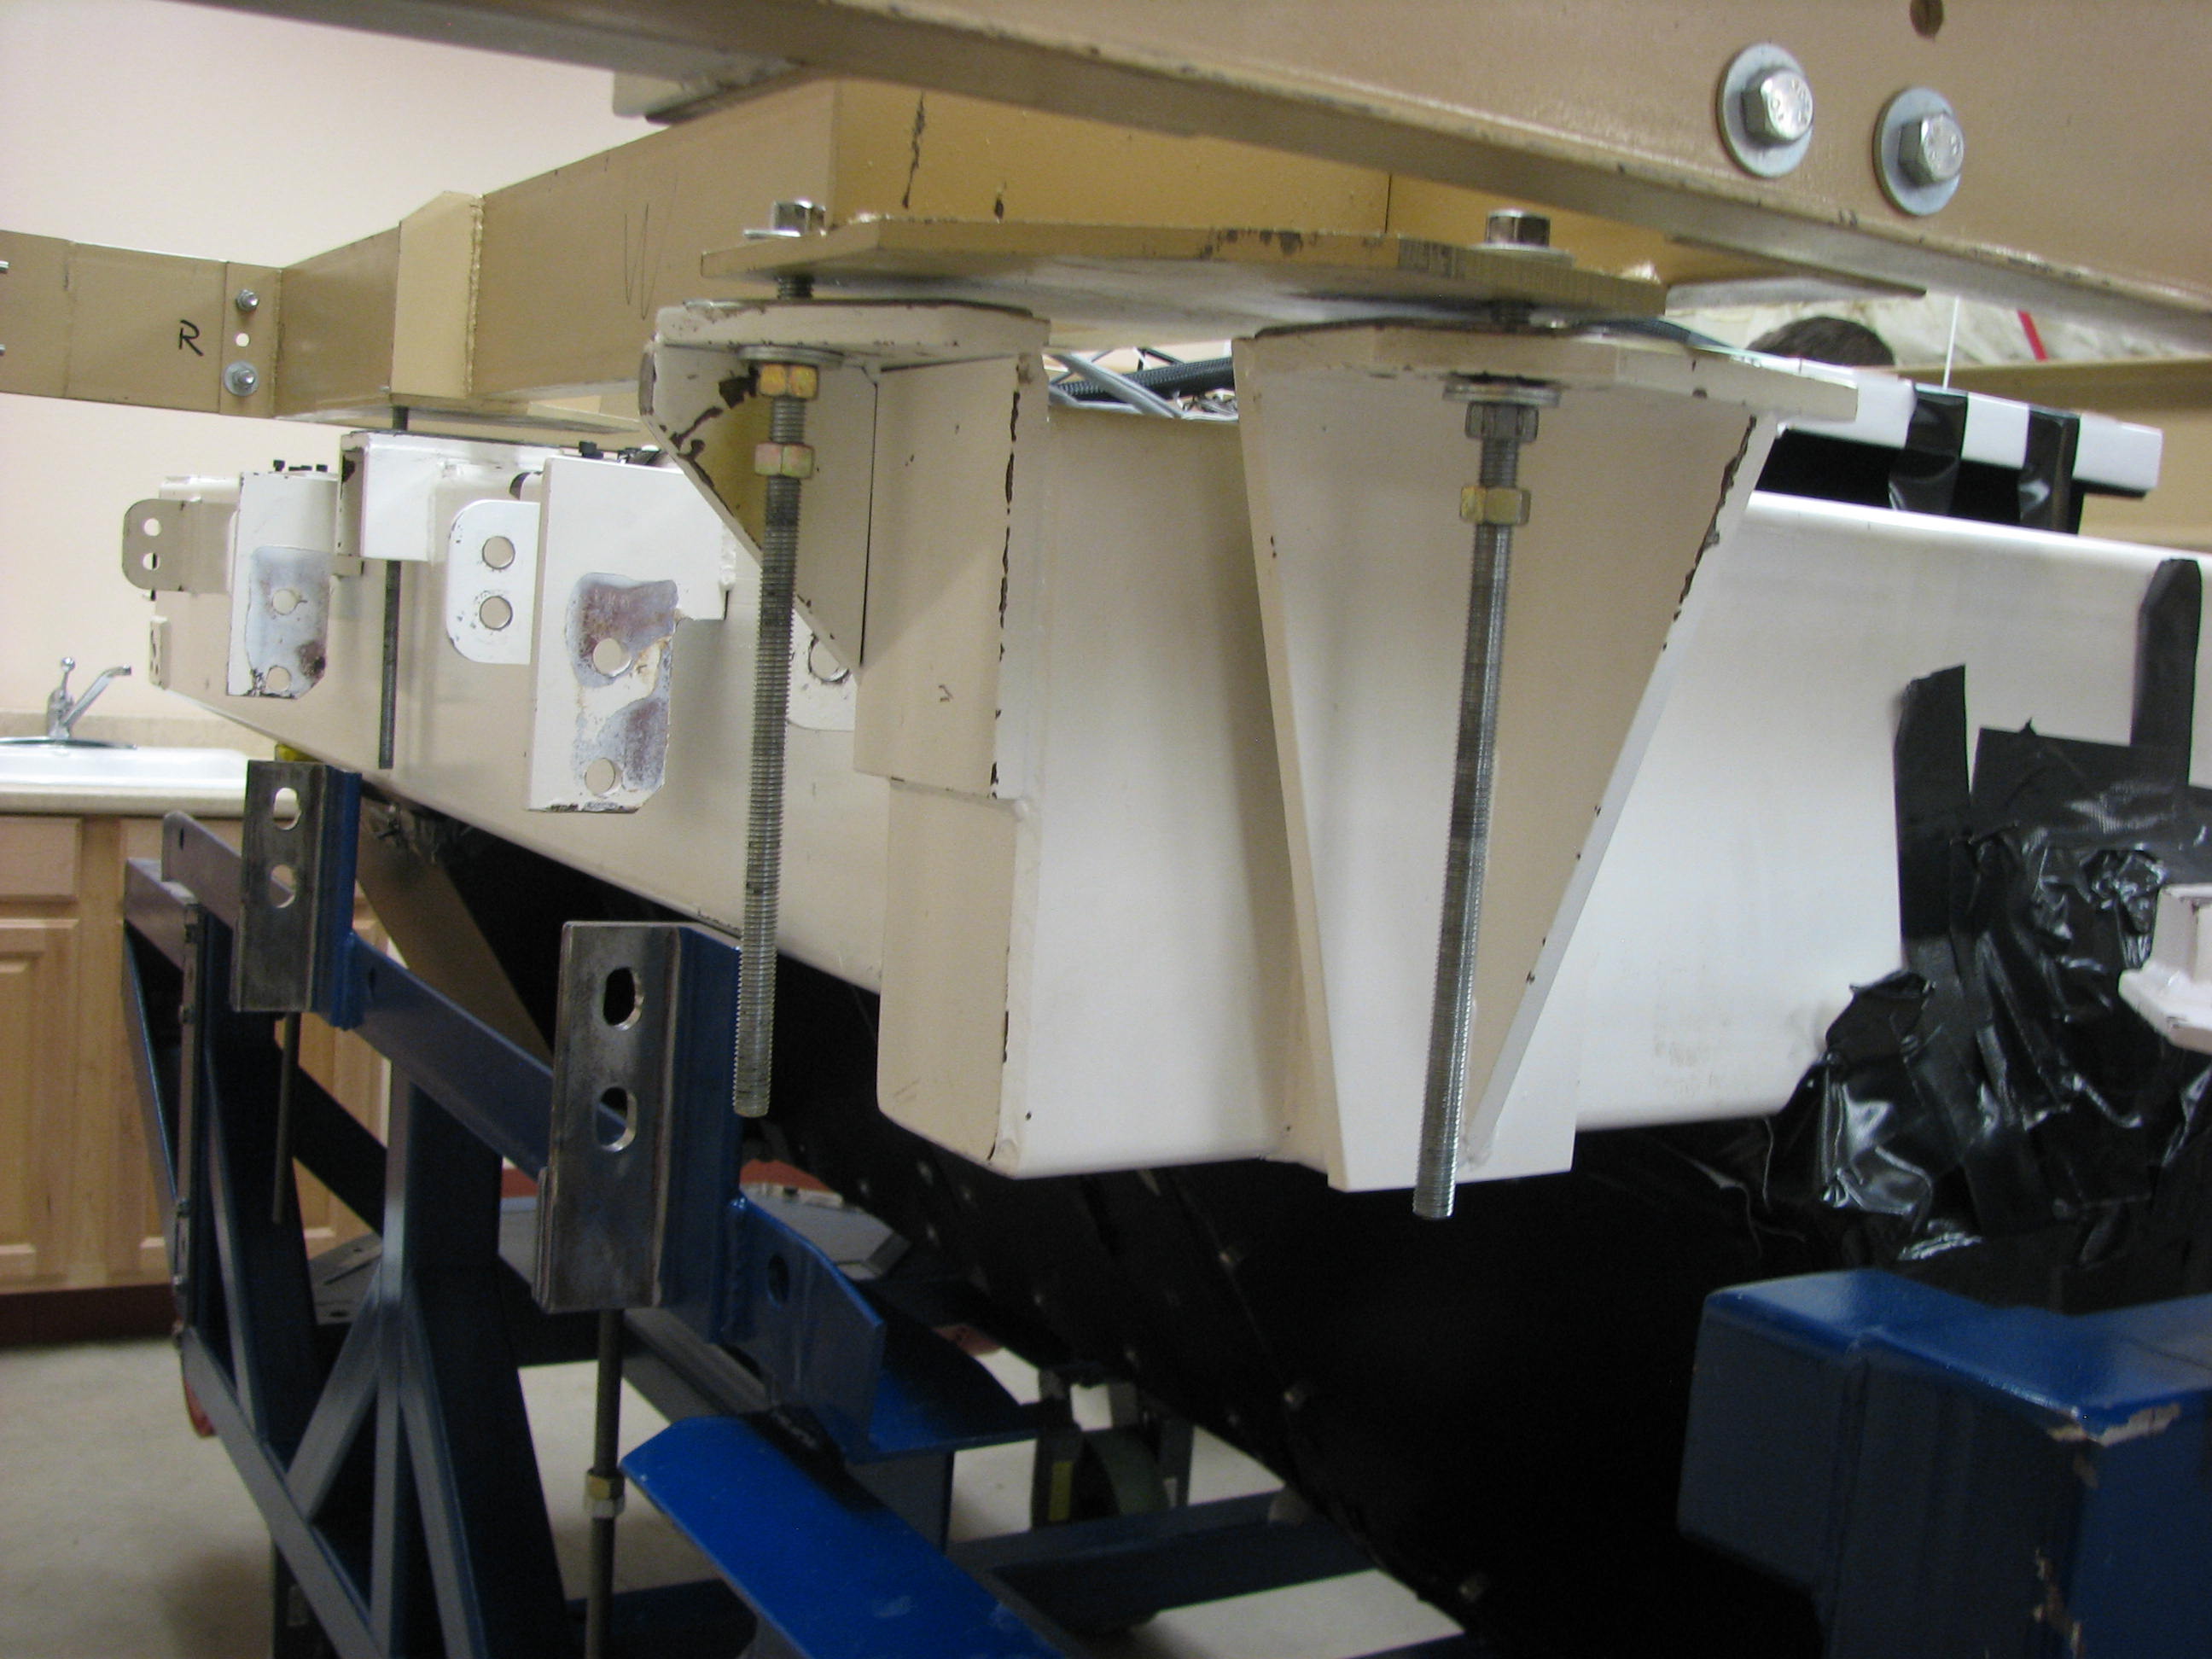
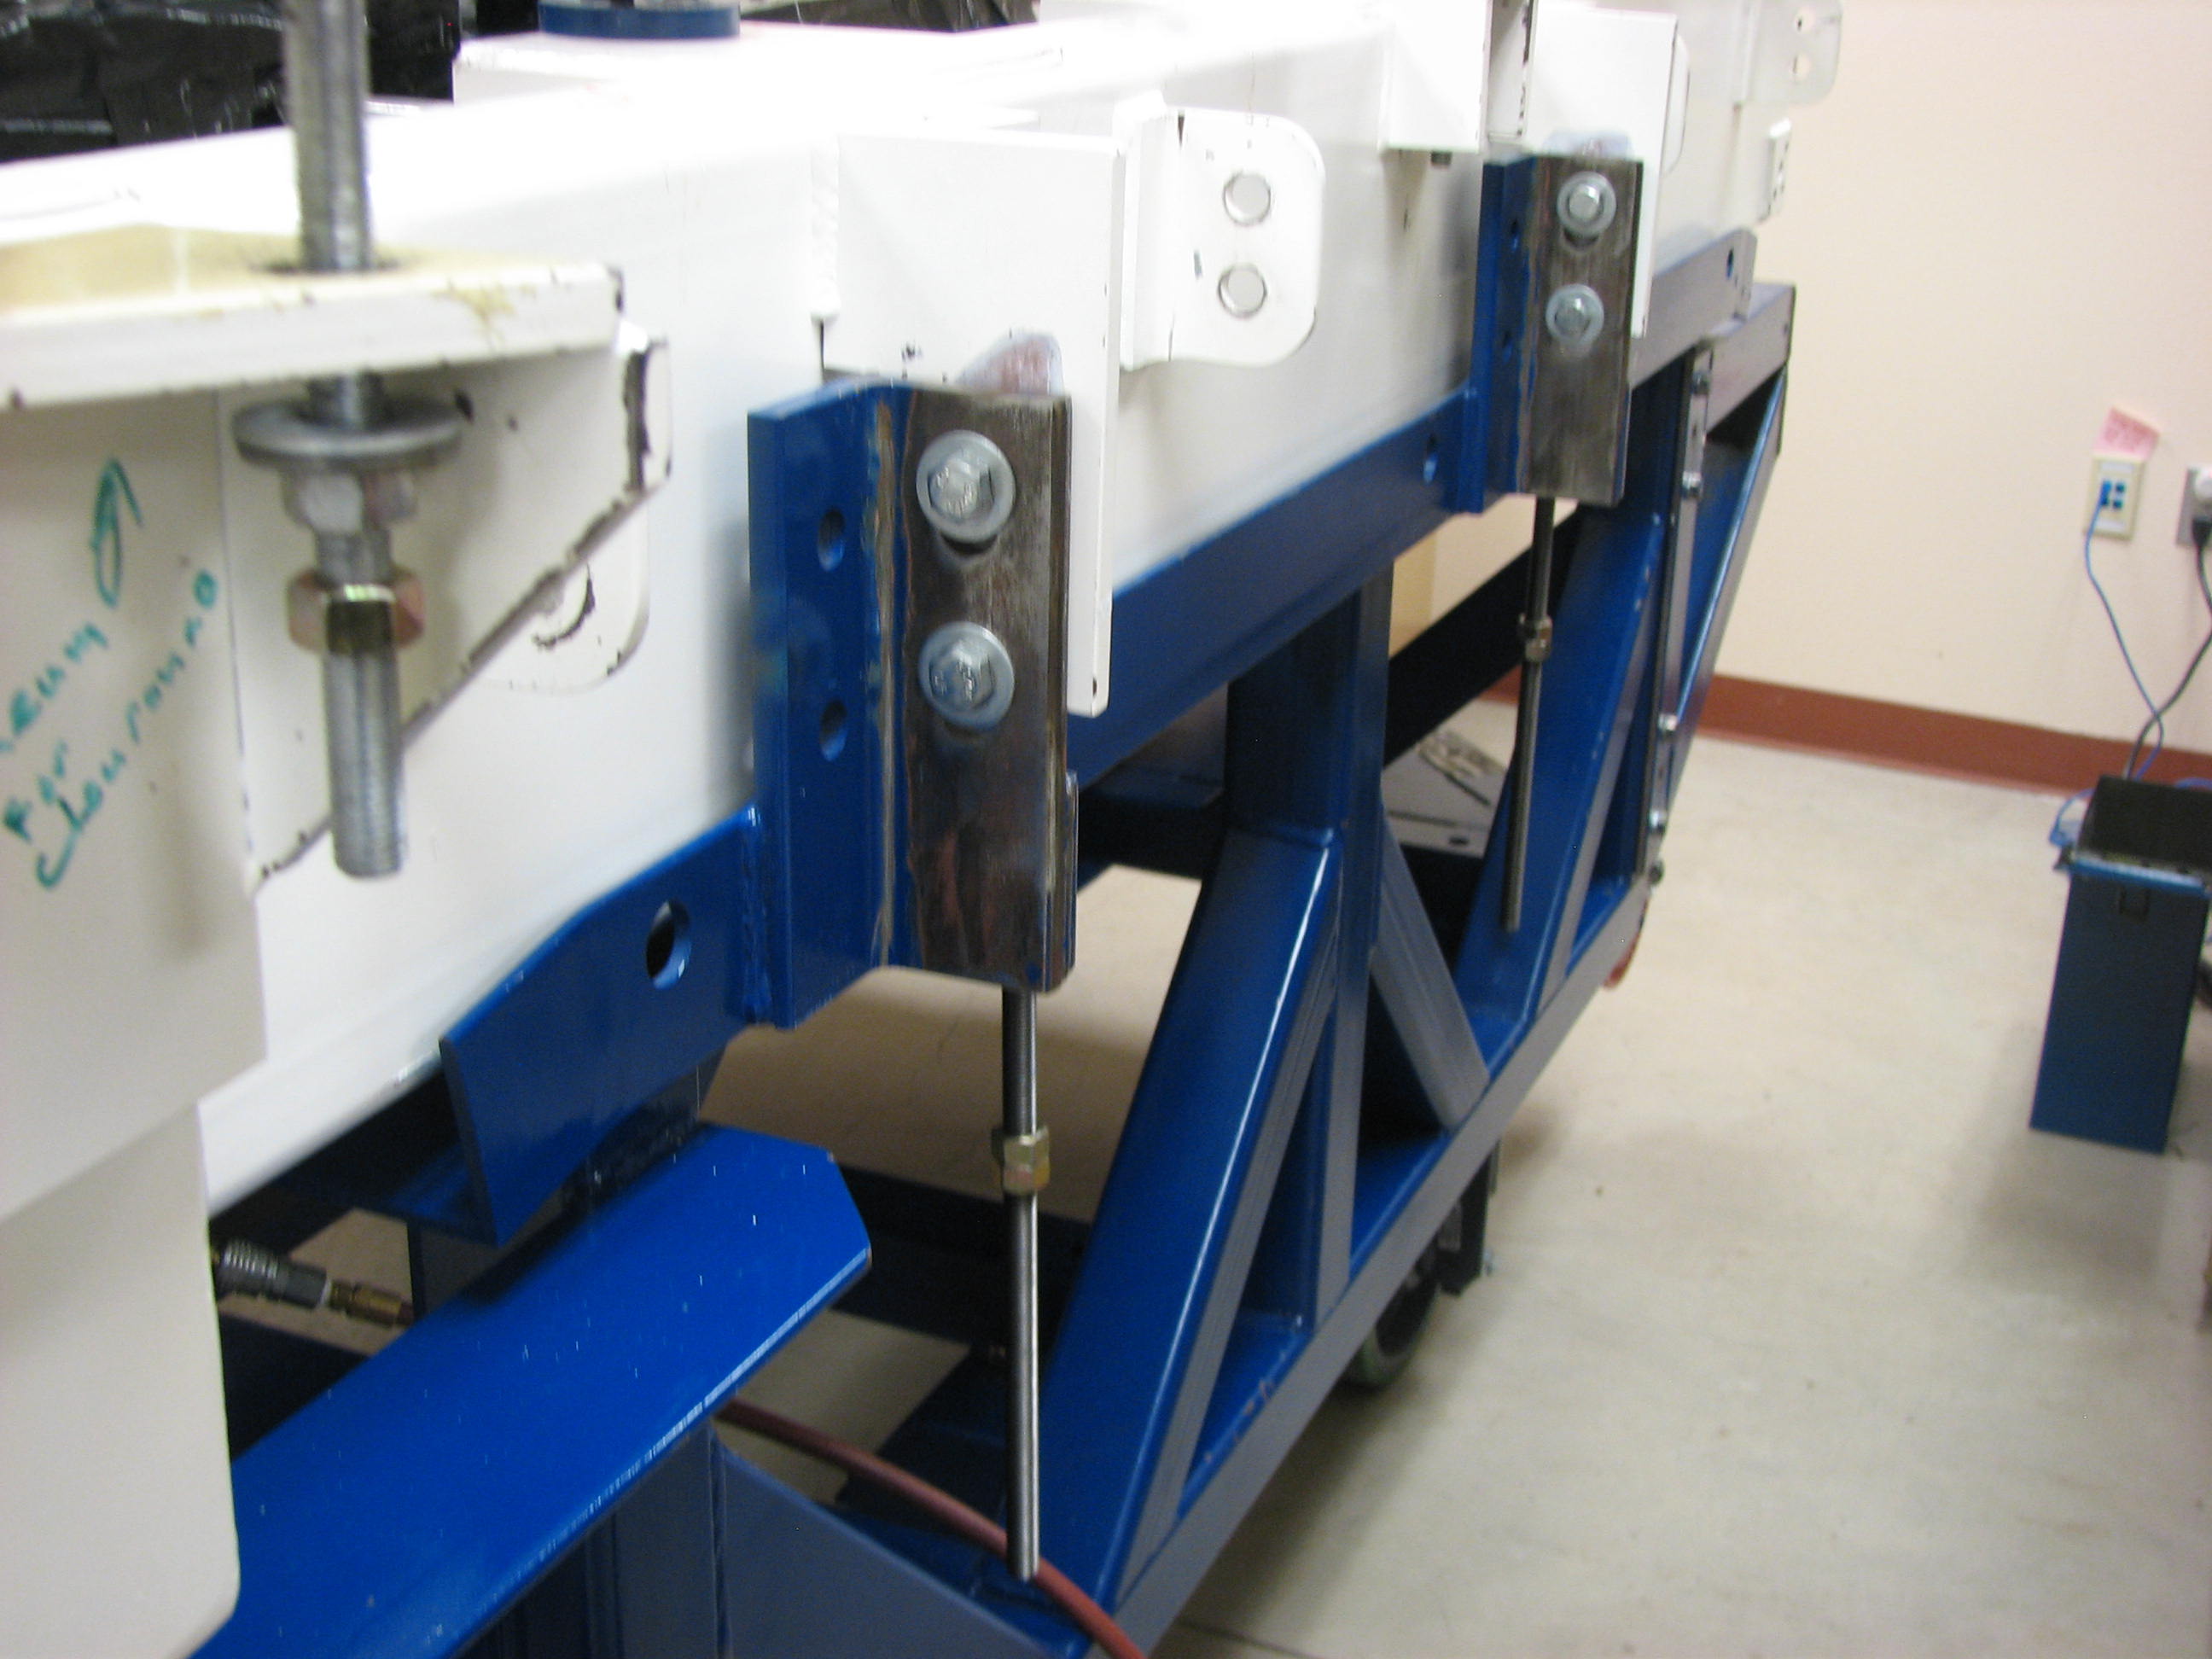
2. Allthread is holding the spectrograph to the alignment frame, via six of the eight spectrograph weldment
wings; the two wings on the inner
side of the weldment are unreachable. There should be double nuts and washers at all
locations. See attached photo.
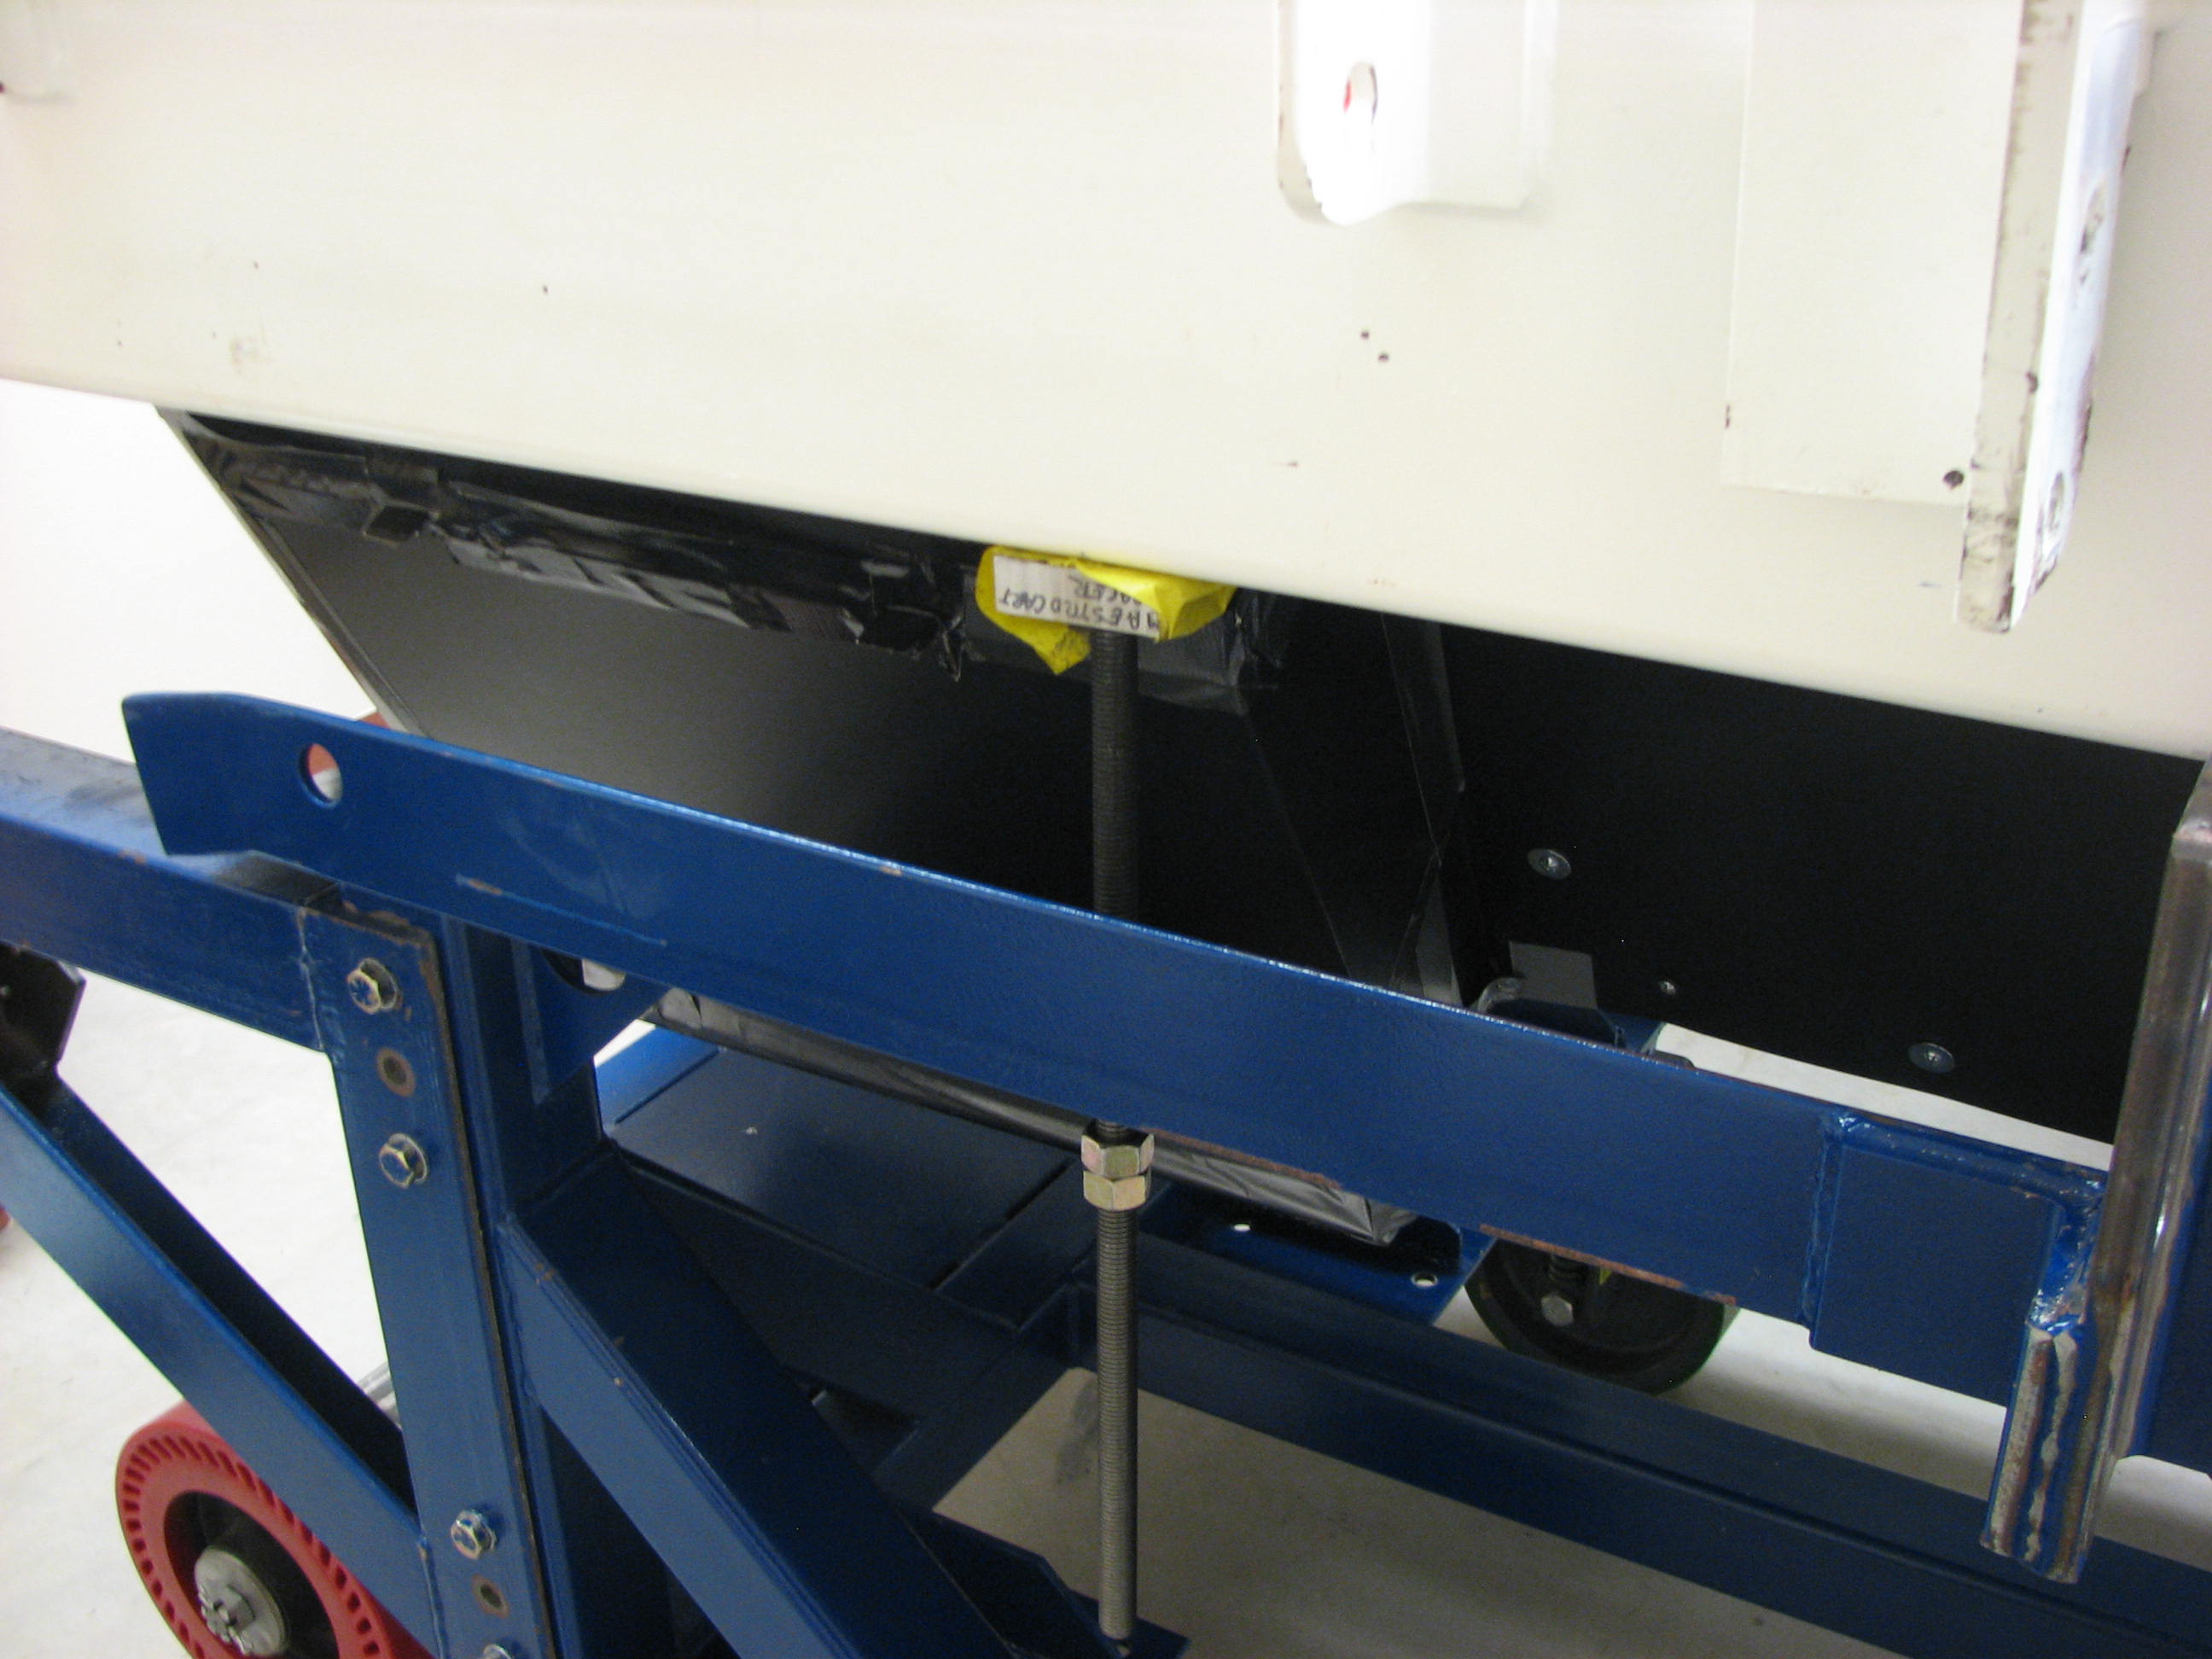
3. On the cart, there are 4 blocks of
aluminum with yellow tape, which push the spectrograph UP. These are used to relieve pressure on the bottom of the
spectrograph. Use the 1 inch
wrench to loosen/tighten the nuts associated with these. See photo.
4. With personnel at each of the 4 corner locations, slowly lower the spectrograph weldment from the alignment frame by loosening the nuts in ½ turn increments
simultaneously.
5. After each 1 inch of movement,
check to see that the spectrograph is staying level as lowered, and tension is
remaining on the dewar end to keep the weldment level. Measure the distance between the
weldment and alignment frame at all points with a ruler.
6. When the spectrograph weldment is approximately 2 inches above the cart
top, check the alignment of the cart to the weldment and adjust cart as
necessary.
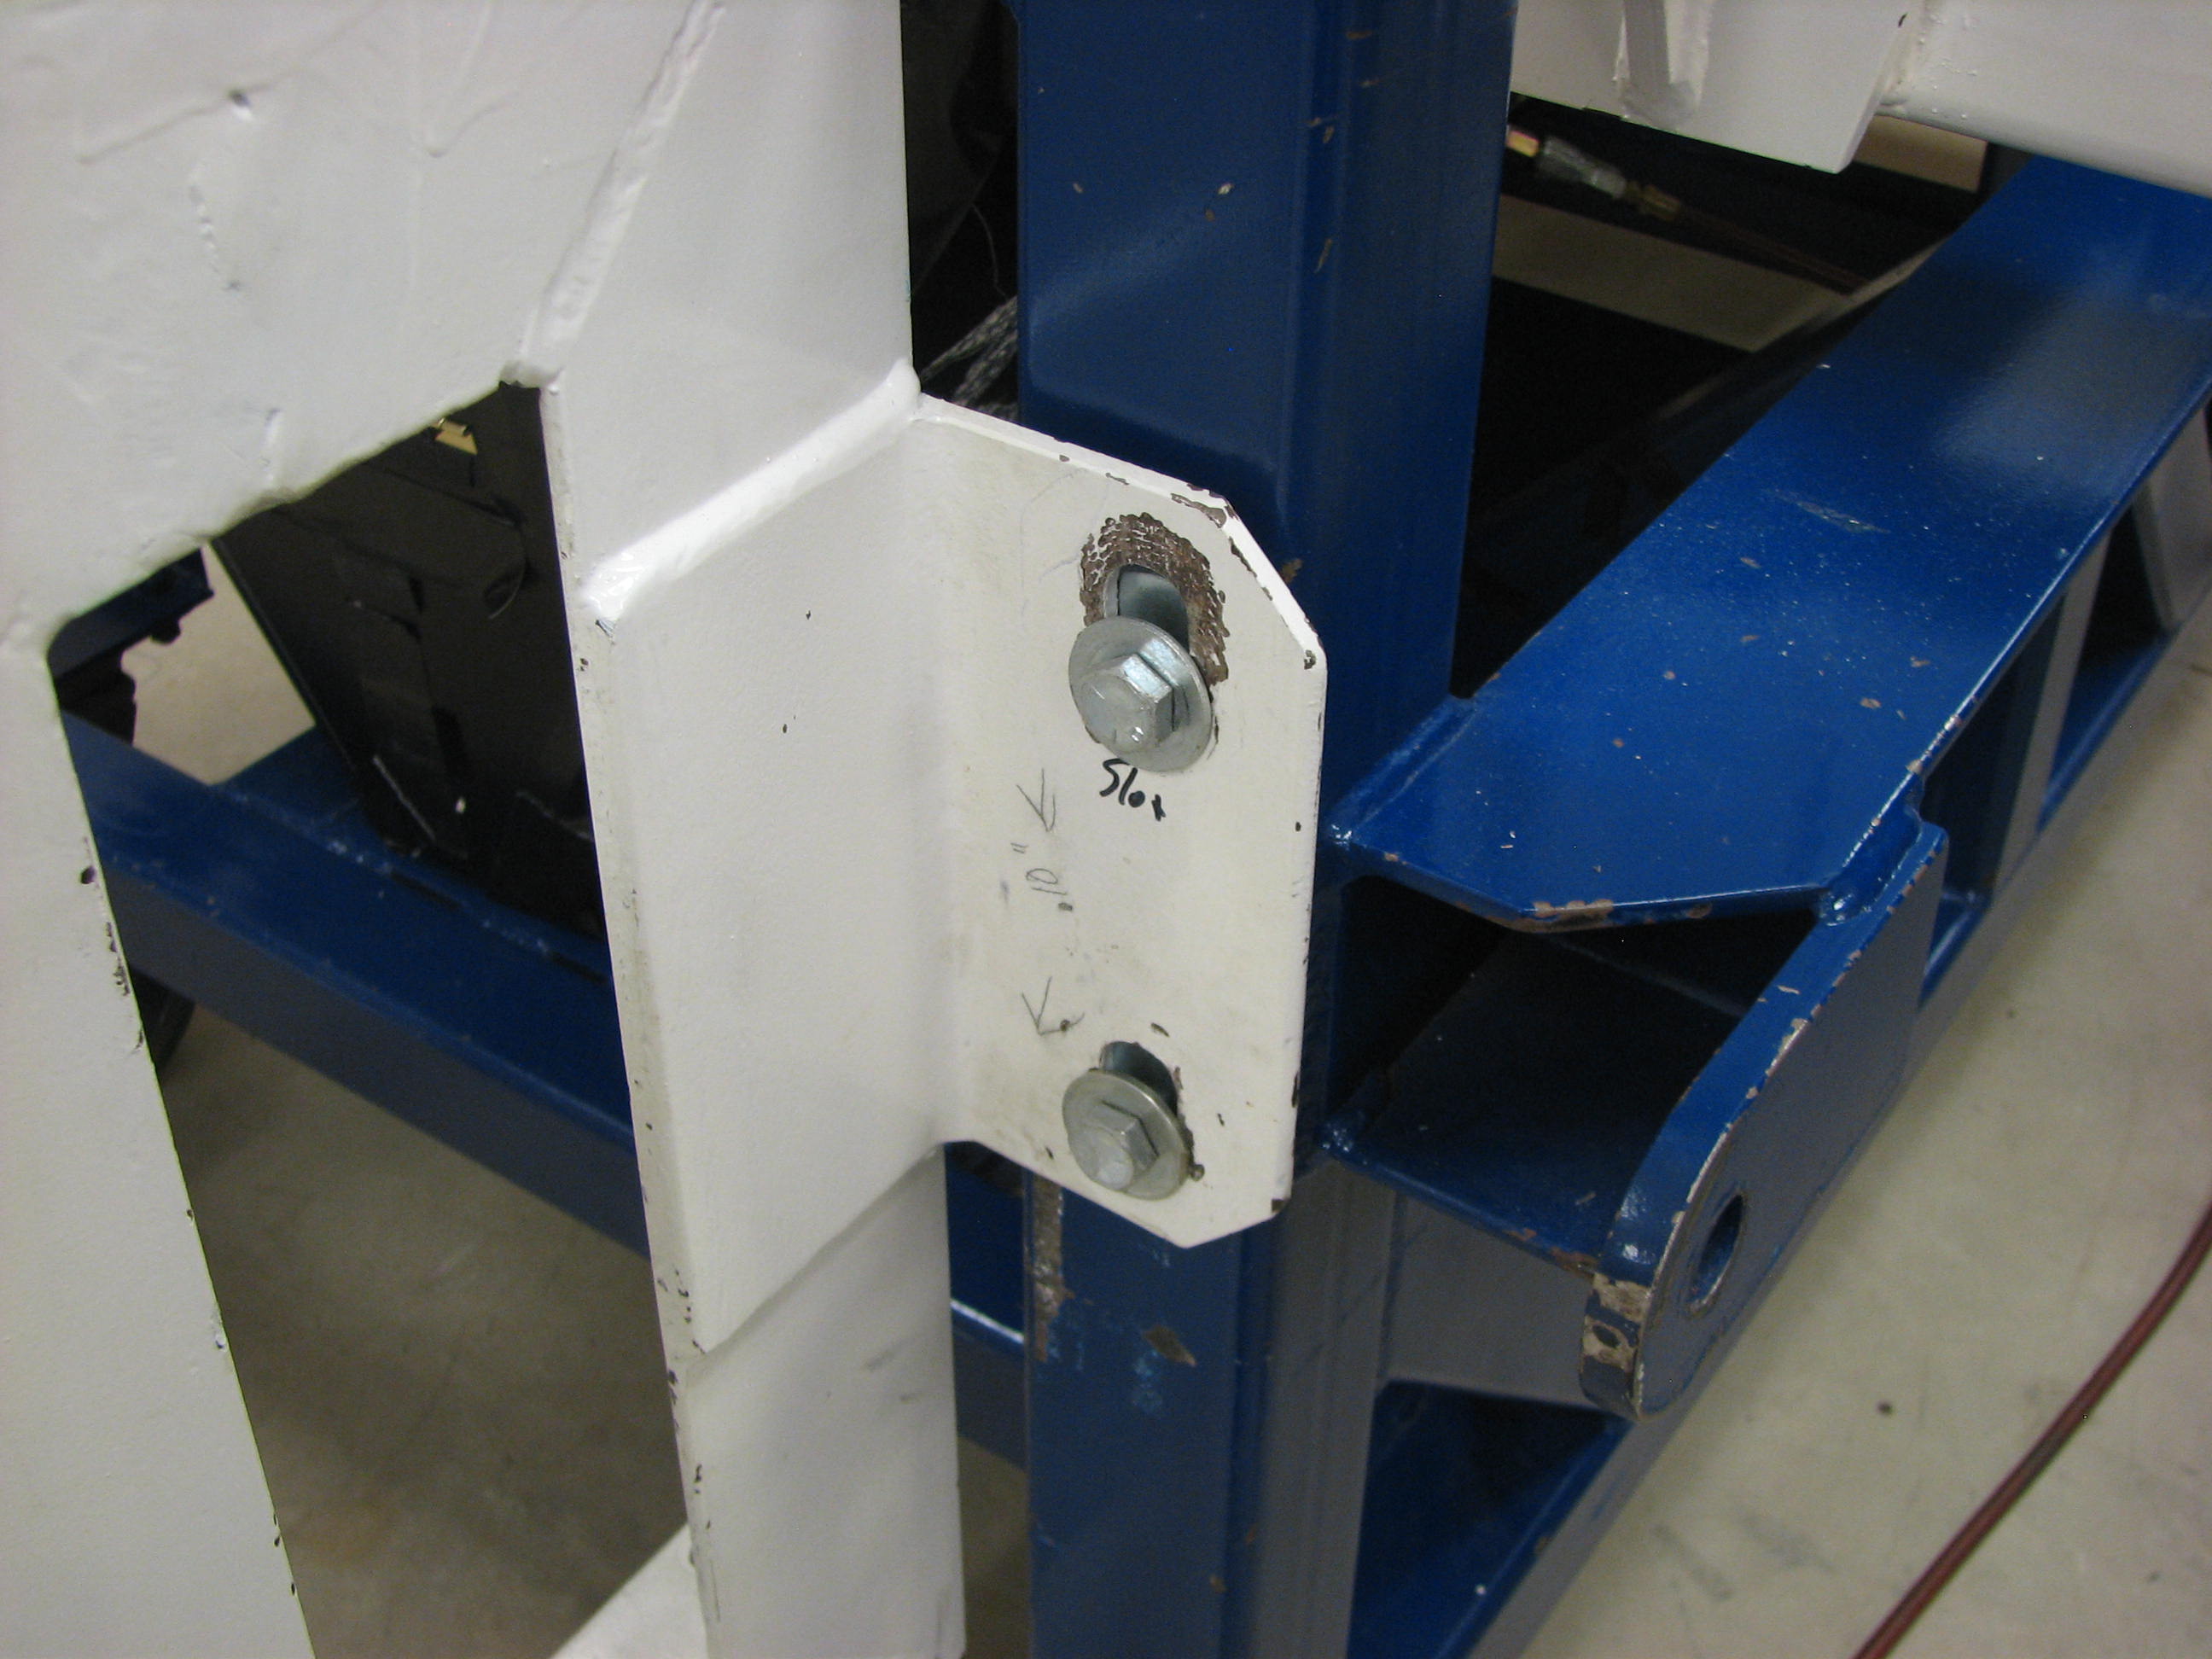
7. Continue lowering by ½ turn increments checking
alignment with holes on the cart, and inserting bolts loosely as holes line up with the cart. See photos.
8. Note that the bottom of the spectrograph will touch the
cart when the spectrograph is on the cart. Watch that nothing is
crushed.
9. Wiggle cart and wedge as
necessary until all 8 bolts are installed.
10. Tighten all 8 bolts to attach the spectrograph to the cart.
11. Remove allthread, reassembling hardware together as removed and attaching it to the alignment frame.
PHOTOS. Click on photo for enlargement.
|

|
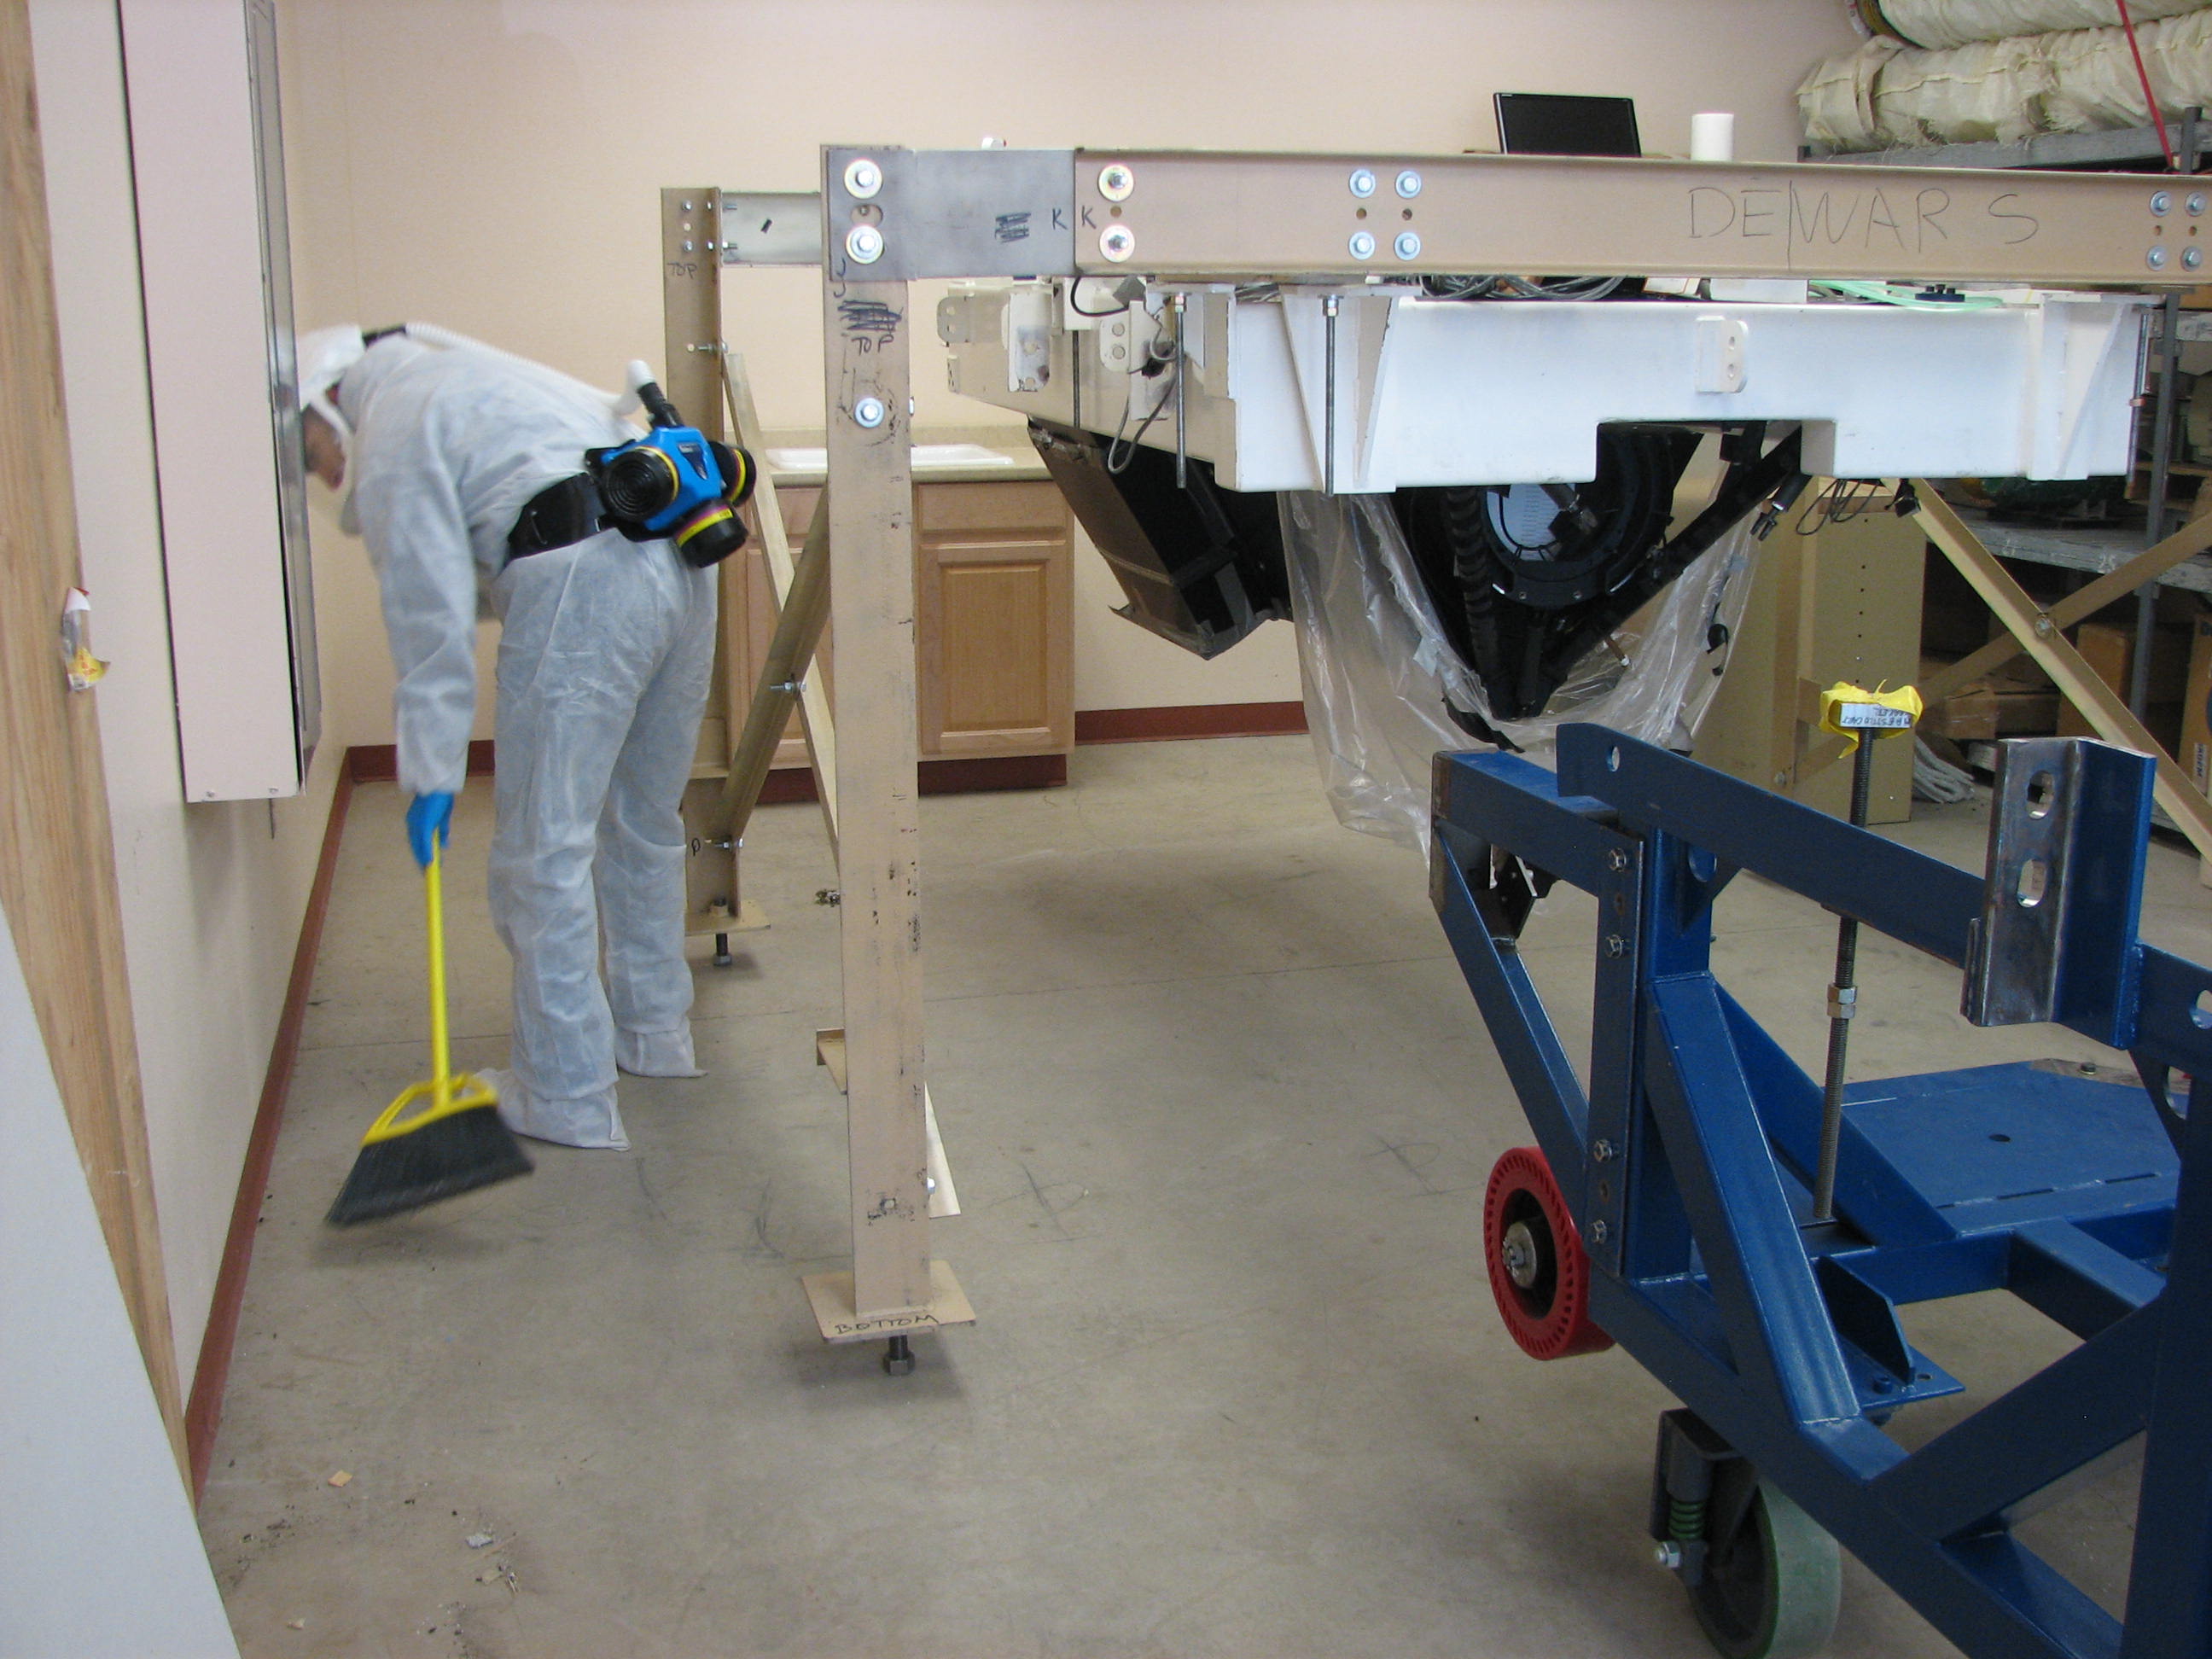
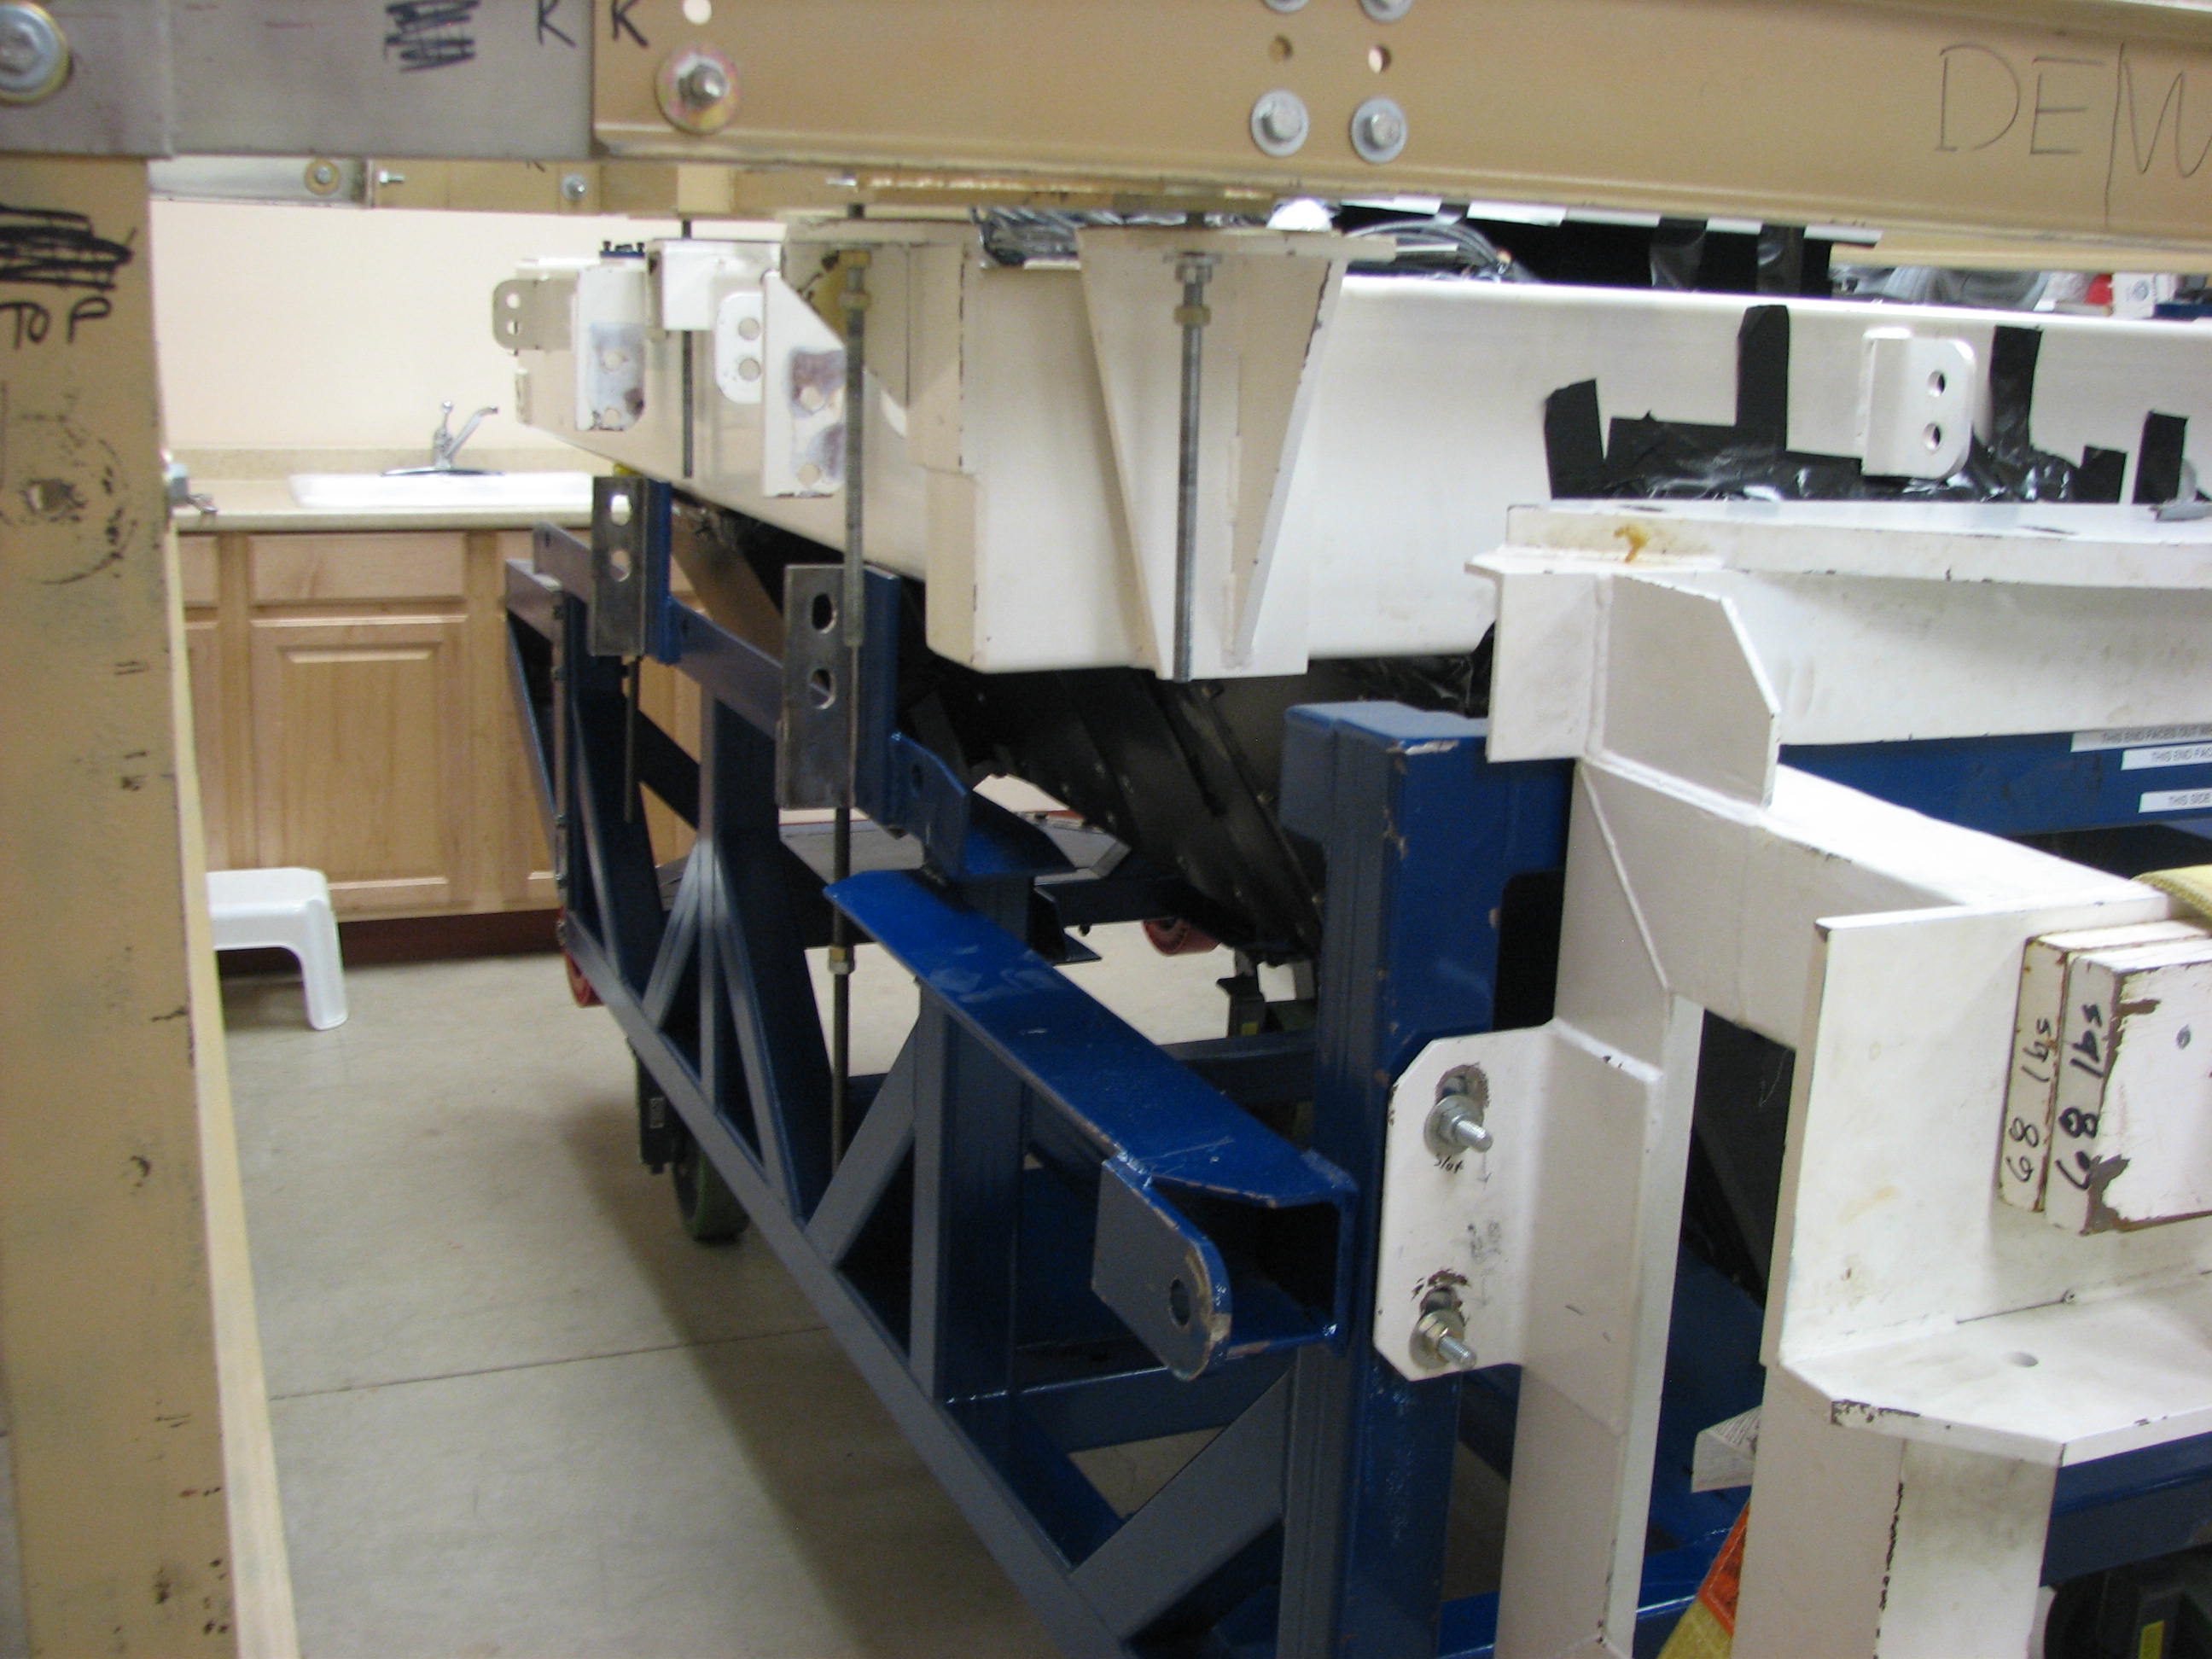
MAESTRO hanging from the tan
alignment frame, in the common building lab at the MMT.
|
|
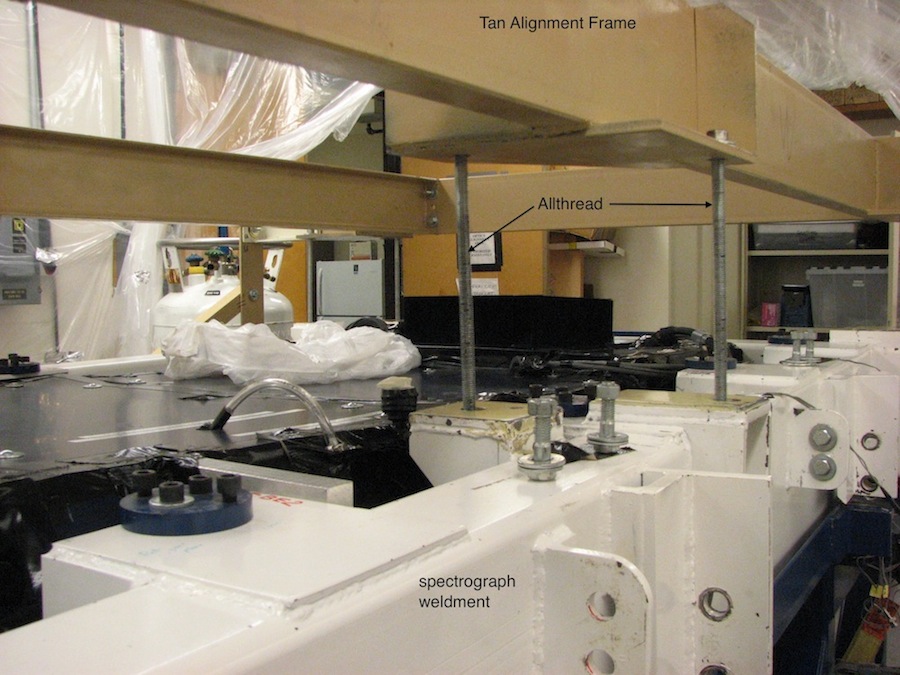
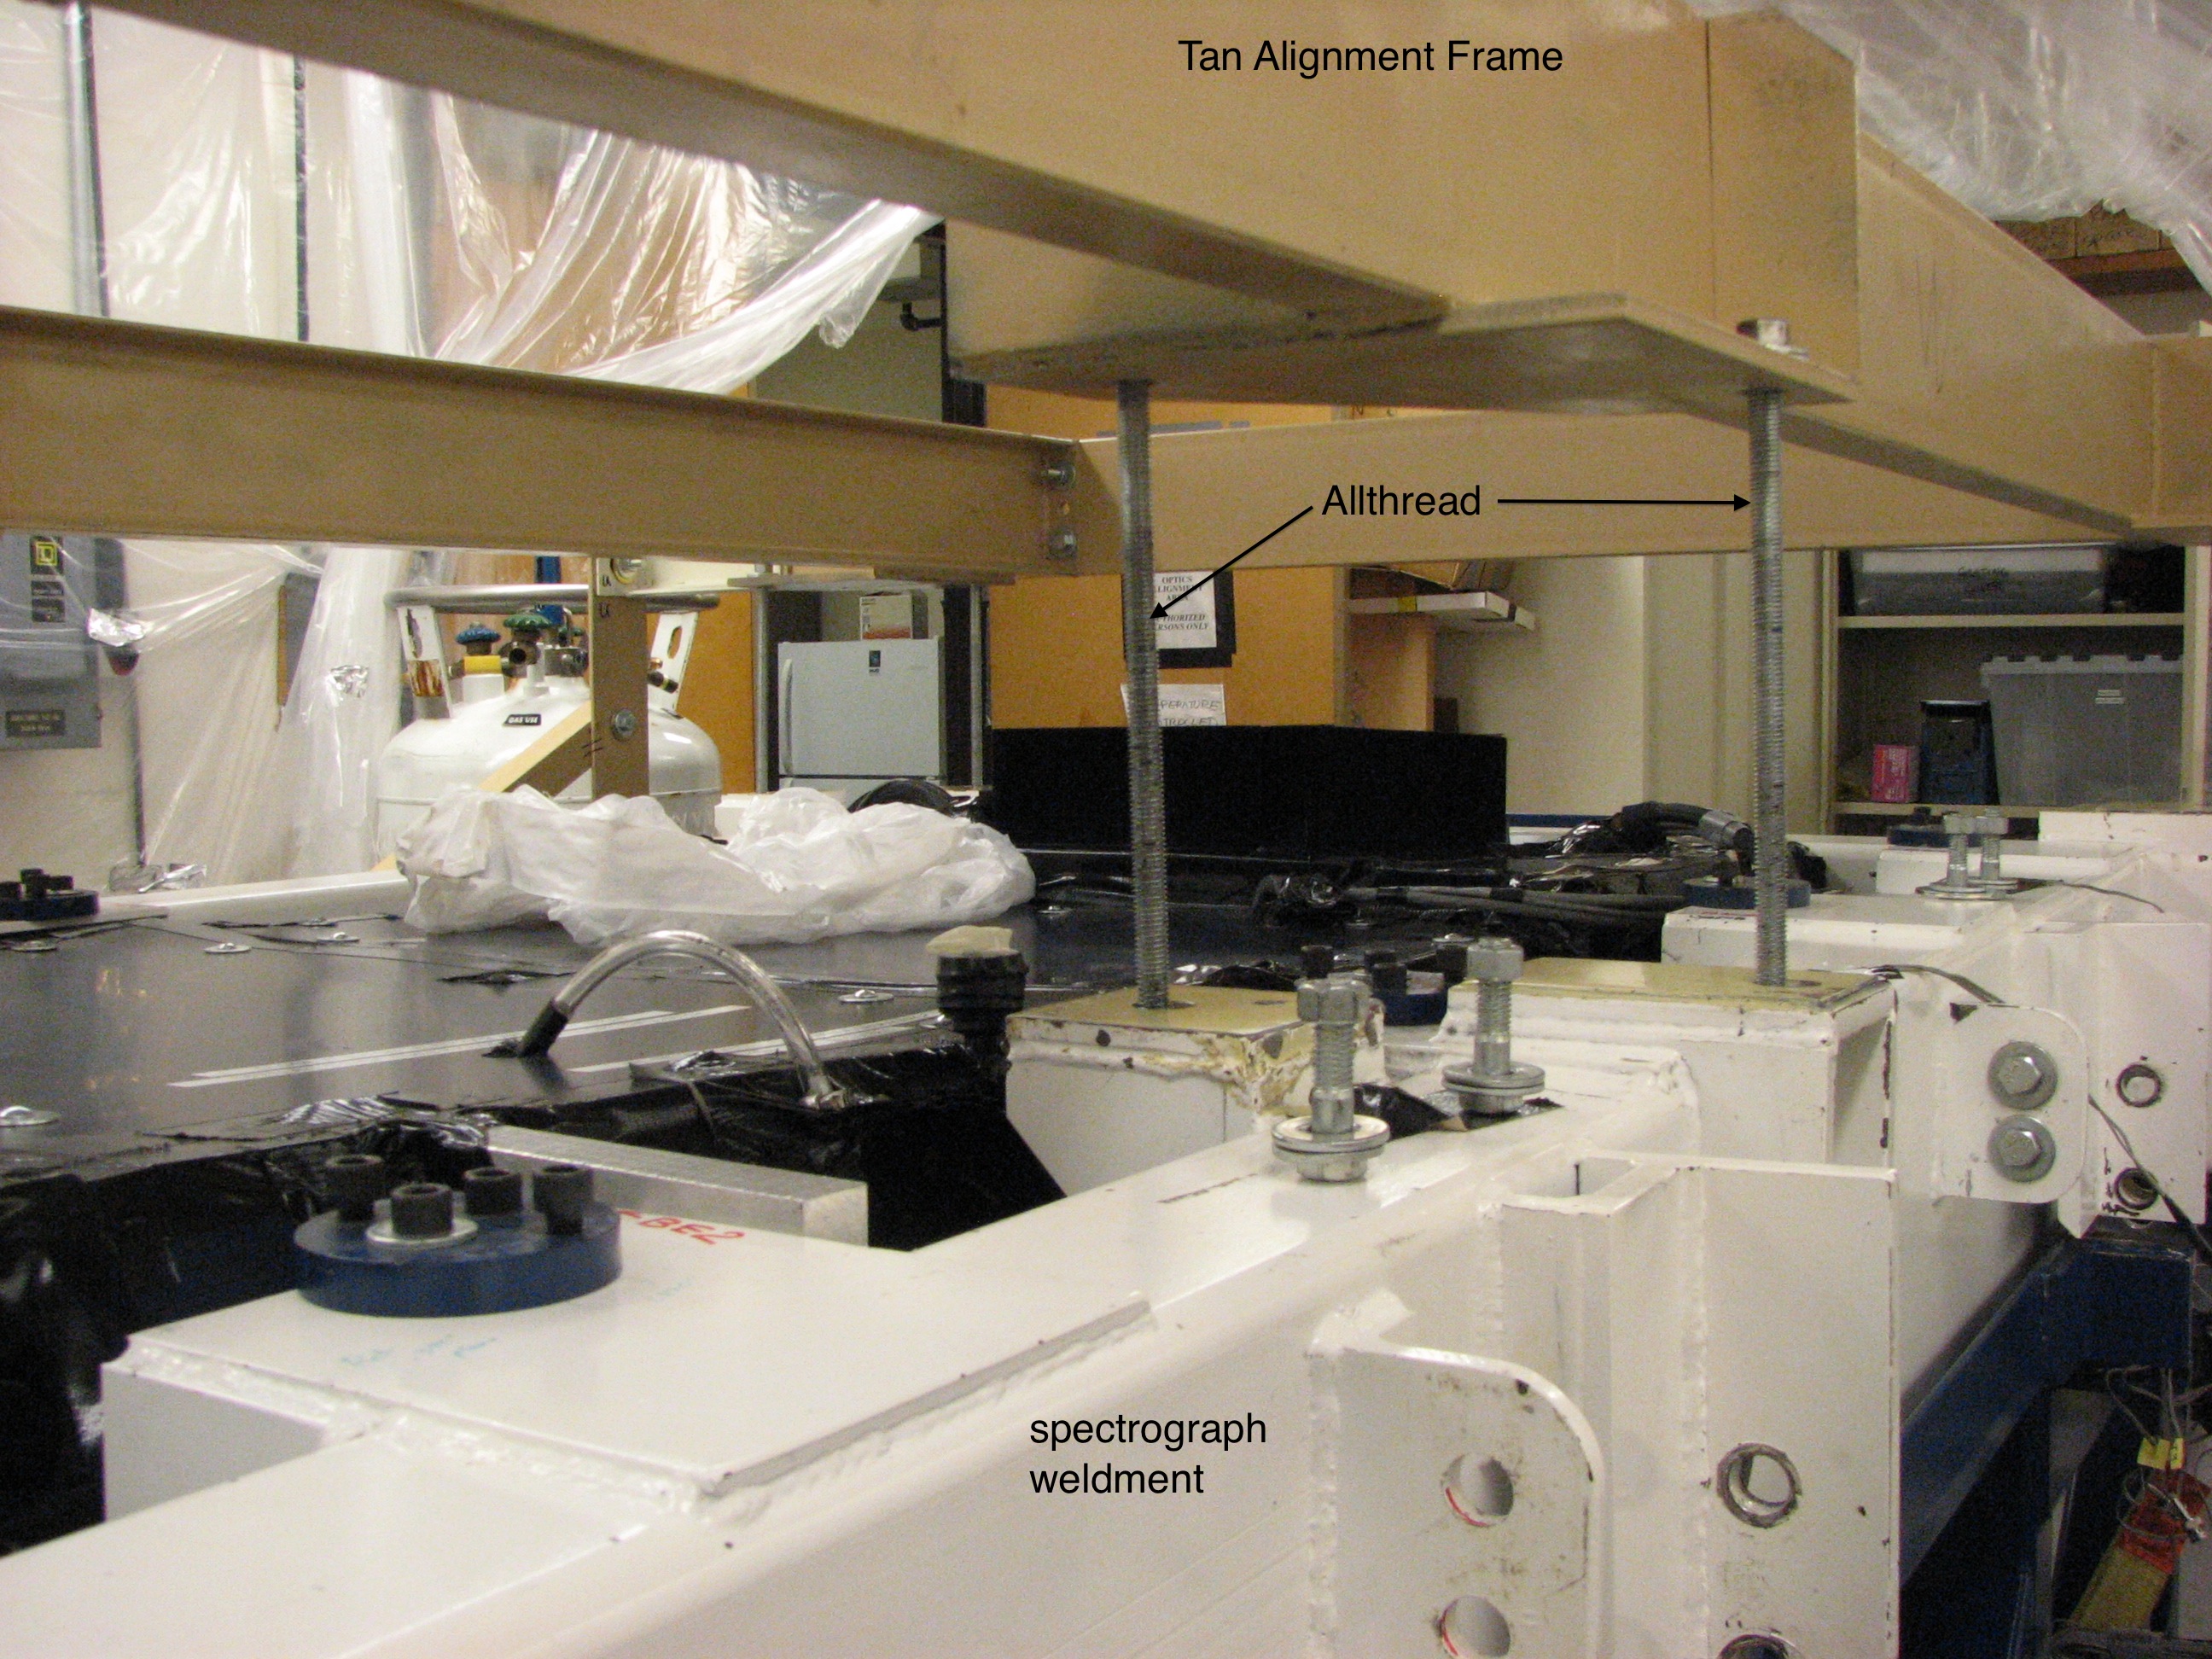
|
White spectrograph weldment is
hanging from the tan alignment frame by allthreads during raising/lowering of
spectrograph from the cart. Two
of 6 total allthreads are labeled.
|